


Handwoven cloth is never quite flat. The slubs catch the light, the weft drifts a little, and the surface keeps a rhythm of its own. That is exactly why embroidery looks so good on it — and why a stitch that behaves perfectly on smooth quilting cotton can sulk here. Threads sink into an open sett, needles drag on thick weft passes, and an over-tight hoop can pull the weave out of true before you have made a single stitch.
None of that is difficult to manage. It simply needs a different order of work: cloth first, then needle, then support, then stitch. Get those four in the right sequence and your first embroidery on handwoven fabric comes out clean, soft, and worth wearing.
Know Your Cloth Before You Thread a Needle
Start with washing. Handwoven fabric often arrives loom-state and will shrink and soften in the first wash — and if that wash happens after the embroidery is finished, the stitched areas can pucker while the cloth around them closes up. Wash a sample the way you intend to wash the finished piece, let it dry flat, and then treat the main length the same way before you stitch.
Then look at the cloth properly. Hold it up to a window: you want to see how evenly the sett sits and how much light comes through. Loose, open weaves need more support; tight, dense weaves need a sharper needle and a bit of patience. Check the grain, too. Handwoven selvedges are often wavy, so follow a single weft thread across the width rather than trusting the cut edge when you square up a design.
Keep a scrap about the size of a postcard. It is your test bed for needle size, thread weight, stabilizer, and washing. Pin it above your work and stitch there first. Embroiderers who skip this step usually end up doing it later on the real piece.
Needles: Match the Point to the Cloth
Handwoven fabric is woven, not knitted, so a sharp point is usually right: it parts the threads instead of forcing its way between them. The exceptions are worth knowing.
- Crewel or embroidery needles (sizes 3–9). Sharp, medium-length, with an eye generous enough for two or three strands of cotton. A size 7 or 8 handles most work on mid-weight handwoven linen or cotton.
- Chenille needles (sizes 18–22). Sharp and sturdy with a long eye. The best choice for perle cotton, tapestry wool, or any thick thread on a textured surface.
- Tapestry needles (sizes 20–26). Blunt. Use them where you are counting threads — cross stitch, border bands, darning patterns — so the tip slides between warp and weft rather than splitting them.
- Milliner's needles. Long shaft, useful for bullion knots and for wrapping stitches over slubs.
Whatever you choose, thread it and pull it through the scrap. If you hear a faint rasp, or the eye leaves a visible mark, move to a finer needle. A good needle passes through handwoven cloth more quietly than you expect.
Stabilizers: Support Without Stiffness
Stabilizer is not a crutch. On handwoven cloth it is often the difference between a flat motif and a puckered one, because an open sett gives every stitch room to pull.
- Tear-away. Good on stable, medium-weight cloth with light stitching. Tear slowly, along the grain, and support the fabric with your other hand so the weave does not distort.
- Cut-away. For loose or slippery weaves, or anywhere you plan dense stitching. It stays in, so pick the lightest weight that does the job and trim close — but not so close that the edge scratches.
- Water-soluble film. Ideal for drawing a design onto dark or slubby cloth, and for very open weaves. Dissolve in cool water and rinse well. Test on a scrap first in case the cloth has a finish that reacts.
- Light fusible interfacing. A strip behind a fragile area can rescue a project. Test the glue on a scrap: a faint shadow of adhesive on the front of a fine linen is permanent.
Place the stabilizer on the back, then hoop the two layers together so they are tensioned as one. If the finished piece has to drape — a scarf, a shawl, a light cushion — keep stabilizer to the stitched area only, or use a wash-away and remove it completely.
Hooping Without Pulling the Weave Out of Shape
The cloth should be drum-tight, not stretched. Handwoven fabric shows the difference: cloth pulled too far springs back when released and leaves the embroidery slightly ballooned.
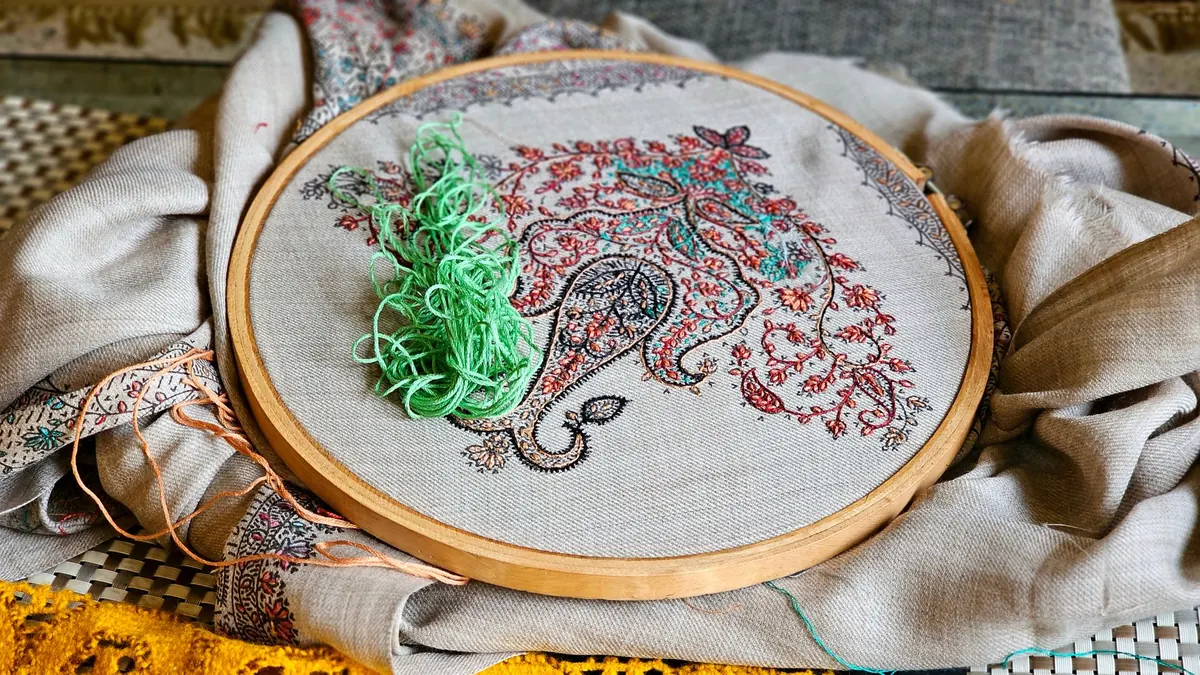
Wrap the inner ring with twill tape or a strip of fine cotton. On slubby surfaces this grips far better than bare wood and lets you work with less tension. Loosen the outer ring, lay cloth and stabilizer over the inner ring, press the outer ring down, then tighten the screw while easing the fabric taut from the edges rather than the middle. Take the work out between sessions; left clamped for days, handwoven cloth takes a set that pressing will not fully remove.
Stitches That Work With Texture
Choose stitches with some substance. Fine, flat stitches disappear into a slubby ground; stitches with length, direction, or volume hold their own.
Lines and outlines
Running stitch is the workhorse. Lengthen it slightly on textured cloth — short stitches drop into the hollows between weft passes and vanish. Backstitch gives a firm continuous line for stems and lettering; perle cotton no. 8 or 12 works well. Stem stitch handles curves gracefully, but work around slubs rather than across them. A stitch forced over a thick weft bump sits proud of the surface and is the first place to wear.
Texture and fill
Chain stitch is generous and quick and suits a heavier thread; keep the loops slightly loose or the cloth puckers when the stabilizer comes out. French knots and seed stitch are forgiving on uneven ground and make the most of cloth with natural flecks. For satin stitch, keep the span short — around 5 mm or less — with stabilizer underneath. Long satin on an open weave sags the day it is finished.
Edges
Blanket stitch worked over a turned edge or a neatened selvedge makes a handsome border, and on a small piece it can serve as the hem.
Your first five
- Running stitch — lines, texture, quilting
- Backstitch — outlines and lettering
- Stem stitch — curves, stems, vines
- Chain stitch — bold lines and quick fills
- French knot — accents, flowers, seed heads
Finishing: Pressing, Washing, and Care
Remove the stabilizer before you judge the work; the cloth will relax once the support is gone. Press face down on a thick towel so the stitches are not flattened, and lift the iron rather than sliding it. Wash in cool water with a mild soap, rinse thoroughly, and never wring — roll in a towel and dry flat, away from direct sun. Store finished pieces folded with acid-free tissue rather than hanging them, since the weight of heavy embroidery will pull a soft handwoven out of shape over time.
Start With a Sampler
Before you commit to a garment or a gift, cut a square of the same cloth, finish the raw edges, and mark a grid of five small squares. Work one stitch in each, using the needle, thread, and stabilizer you plan for the real piece. Wash it, press it, and keep it with your threads. That little square will tell you more about how this particular cloth behaves than any instruction can — and when you begin the real thing, you will already know exactly how it feels under the needle.